I've logged this at Bloc, but this was at a private wall inside the Castle Park View residential complex that Bloc manage.
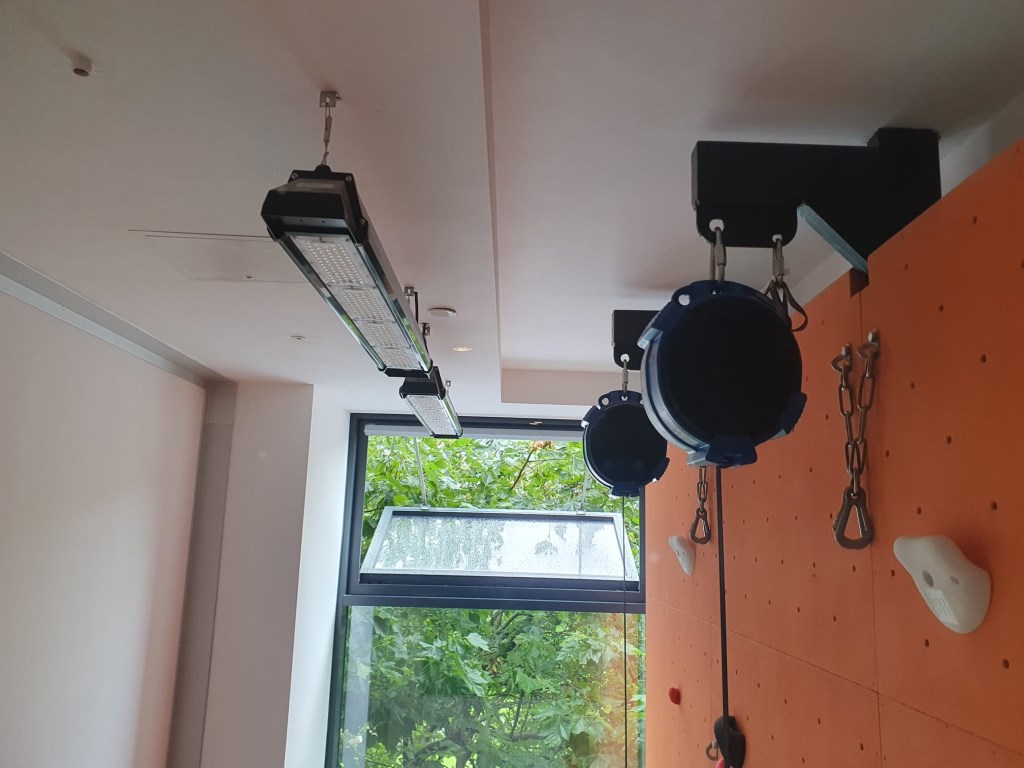
This was the removal of the TruBlue units (x2) from the top of a 15m wall and lowering them down to be sent off for inspection and service prior to the site being opened to the residents.
Due to the TruBlue tapes being extended for over 2 years while being in situ, it was of my opinion that they were not to be trusted. I had tested them prior to ascending the wall and they did not catch in an appropriate time.
So I ascended and clipped into each bolt, before climbing higher and clipping the next bolt with the other end of the lanyard, then reaching down and unclipping the lower bolt. This was the process of getting to the top of the wall.
Equipment used:
•1x 20 metre static rope (Coiled and with a pre-tied Fig 8 on bight knot in one end, attached to the harness of the ascending staff member)
•1x 40m Static rope (10mm)
•2x Petzl Rig
•1x Dual Adjustable lanyard with carabiners.
•3x Steel oval screw gate carabiners
•1x Adjustable spanner on accessory cord + carabiner.
•2x Sit Harness with gear loops.
Procedure (designed by myself, reviewed by J.Davis)
1.Staff should clear the auto belay area of all individuals.
2.Staff members X & Y should put on their harnesses.
3.One staff member will clip into the autobelay. They should have the 40-metre attached to their harness.
4.Once at the top, clip their lanyard to one of the dual anchor bolts. They will thread the rope through the lower offs and after unclipping their lanyard; lower off using the autobelay and unclip from the autobelay once back on the ground and tie into the newly installed rope.
5.Staff members (X) and (Y) will now put on their helmets.
6.Staff member (X) will stay on the ground and belay (Y) with a Petzl Rig.
7.The staff member (Y) tasked with removing the autobelay, will ensure that the adjustable spanner is attached to a gear loop via the accessory cord (Lark’s foot) and that they have the sling, steel carabiners, other Petzl Rig and 20 metre static rope, attached to them.
8.Staff member (X) will now retreat to a safe distance, so that they are not directly underneath the TruBlue units.
9.Staff member (Y) ascends the wall with Staff member X belaying from the ground using Petzl Rig.
10.Once at the top of the wall, staff member (Y) will clip the 20m static rope attached to them to the dual carabiner anchor and clip their lanyard to one of the bolts of the hanger.
11.Then staff member (Y) will clip a steel carabiner to Trublue Anchor point A* (see photos above)
12.Correctly thread the end of the rope with the pretied Fig.8 on bight through the Petzl Rig and secure the Petzl Rig with the carabiner on Anchor point A.
13.Clip a steel carabiner through the Fig.8 on bight and attached to the spare attached eye on the front of the TruBlue unit.
14.Tie a catastrophe knot in the brake end of the rope coming out of the Petzl Rig.
15.Check the gates on both carabiners are screwed up.
16.Use the spanner to undo the mallion found at Anchor point B and clip to the TruBlue unit.
17.Clip a Steel carabiner through Anchor point B and thread the “brake end” of rope through the carabiner.
18.Drop the remaining rope to the floor.
19.Check all carabiners to ensure that they are locked.
20.Then test the system by taking in the “brake end” and slowly release to see if the Petzl Rig holds.
21.Tie a catastrophe knot into the brake strand (over hand on bight).
22.Check all carabiners to ensure that they are locked.
23.Use the spanner to undo the mallion holding up the Trublue unit at Anchor point A and detach from the unit.
24.Remove mallion from Anchor point A and reattach to the TruBlue Unit, remembering to screw up the mallion.
25.Now the TruBlue unit should be free from its attachment points and being held by the Petzl Rig.
26.Hold the brake strand and pull out the catastrophe knot.
27.With one hand on the brake end of the rope and another on the Petzl Rig release handle, follow this pattern:
a.Pull the handle enough to slowly feed the rope through the Petzl Rig.
b.When your hand reaches near to the carabiner with the brake end running through it, release the handle.
c.Slide hand down the brake end of the rope and then hold tight.
d.Repeat steps above.
Source: https://www.petzl.com/US/en/Sport/Lowering-from-a-fixed-anchor-point?ProductName=GRIGRI#:~:text=The%20belayer%20takes%20up%20slack,brake%20side%20of%20the%20rope.
28.Staff member (Z) can now approach and detach the TruBlue unit from the rope.
As soon as the area is clear again, staff member (Y) can focus on the second TruBlue unit.
29.Remove the steel carabiners, Petzl Rig and staff member (X) will lower (Y) to the ground.
30.Follow steps 1 to 26 to lower the second unit.
31.Once complete and staff member (Y) is safely on the ground. Leave the 40-metre rope in situ on the wall for installation of the TruBlue units.
Area :
Bloc Climbing - Bristol